How can you tell which is the right way up to lay a natural stone paving slab?
When laying natural stone paving slabs, it is important to ensure you are laying them the correct way up, to ensure you achieve a perfect patio.
Natural stone paving is a beautiful material to use for landscaping your garden. At Stoneworld we have a wide range of natural stone paving options in many different formats.
How to lay natural stone paving slabs the correct way up
Natural hand-cut stone paving with a riven surface will have a larger surface on the upper side. The underneath side, the one to place on the mortar bed, is slightly smaller. See our example below.
Example 1 : an unlaid slab sitting the right way up

Natural stone pavers with a riven top are always laid with the larger surface uppermost, every time!
See how the joints will sit on natural paving laid the right way up
Laying the paving the correct way up will ensure the texture of the surface is more attractive, and the joint is presented in the right way, meaning that the pointing joint is secured. See our example below.
Example 2 : an unlaid slab sitting the wrong way up


See how the joints will sit on natural paving laid the right way up
Laying the paving the right way up will ensure the texture of the surface is more attractive, and the joint is presented in the correct way, ensuring the pointing joint is secured, see below.
See how natural paving joints sit on natural paving laid the wrong way up
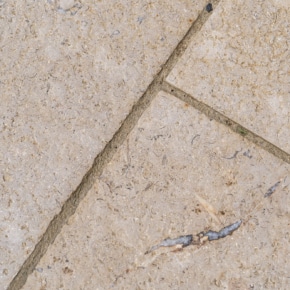
If slabs are laid the wrong way up, a rougher surface texture is revealed, along with unsecured joints.

Natural stone paving laid correctly
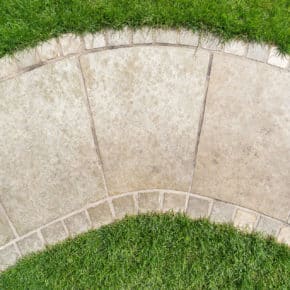
Here we have an example of correctly laid sandstone paving. See how the joints present at right angles to each other, and the finished surface is riven, but safe and even.

Natural stone paving slabs laid incorrectly
The example below is what natural stone paving slabs might look like if they have been laid incorrectly:

Does it matter if natural stone paving slabs are laid the wrong way up?
You can see that the stone still has attractive markings, even on the incorrect side, however the joints are not completed to a good standard due to the wider gaps in between the slabs. In this example, the wider surface is lying on the sub base, therefore even if the slabs are touching underneath, this has the effect of splaying the joint at the top surface. Over a few winters you can see how the unsecured mortar will break free from the paving and how the surface of the paving will flake away where the riven surface is more marked. Unfortunately, this will mean that deterioration happens relatively quickly.
Read our advice on how to correctly lay a natural stone patio here.
How can you tell the right way up with a sawn paving slab?
In the case of sawn paving, it is often described as sawn on six sides with a honed or sandblasted finish. The finish is applied to the uppermost surface, the one that is to be displayed. On the underside it is possible to see faint lines, caused from milling the stone. See the images below as examples.
Example 1: Sawn paving laid the right way up

Example 2: Sawn paving laid the wrong way up

Hopefully this article has provided some useful insights into how to lay natural stone paving slabs the correct way up. However, If you have any questions, please call us on 01844 279274 or email us at sales@stoneworld.co.uk and our team will be happy to help.
Are you ready to start your project? Follow our advice for laying a natural stone patio here
Stoneworld have a wide range of natural stone paving to choose from, for your project:
View our range of natural stone paving
After your patio is laid, we recommend using our range of Rob Parker’s Best products to care and maintain for your stone.


